| 04-15-2015, 05:27 PM | #1 |

1767
Rep 7,651
Posts |
IND | F85/F86 Color-Matched Front Reflector DIY
Painted reflectors are among the first additions made by any owner of a modern BMW. The unsightly orange reflectors installed in cars bound for North America instantly break the smooth lines of BMW bumpers.
IND provides painted reflectors as a cost effective solution relative to the purchase of a OEM European bumper. We start the process using the OE BMW reflectors for a factory fit, and the same paint process we would use to spray an entire car. Each reflector is sanded, primed, and then painted to specification. We ensure that all lettering on the face of the reflector is completely removed providing the same flush finish as your factory bumper. Additionally, installation of the reflectors requires removal of three on-time use rivets. IND supplies OE BMW replacement plastic rivets with all front reflectors. Many enthusiasts enjoy installing their own painted reflectors, so weve created this installation DIY to help. Tools needed:
http://ind-distribution.com/ind/?make=22&model=383 Step 1: Please reference BMWs user manual for safely jacking the F85/F86 X5M/X6M Step 2: Now that the vehicle is safely lifted, remove the front wheel from the vehicle. Step 3: Access to the vehicles front reflectors requires the removal of the fender liner. First, remove the thirteen 8mm bolts on the front partition of the fender liner. You are only removing the front portion of the two piece liner, so no need to do the 8mm bolts on the rear partition. Step 4: Now that the 8mm fasteners are removed it is time to focus on the 3 one-time use rivets. To remove these pieces you can use a variety of tools, but we find it easier to utilize a metal tip fastener remover. Step 5: Remove the one 12mm bolt Step 6: Use the fastener removal tool to remove the two multiple-use rivets. Step 7: After these fasteners are removed, you are now able to remove the front of the fender liner. Step 8: With the liner removed take a second to admire the coolers and locate the back of the front reflector. This being a new vehicle, we did not have to apply heat for removal of the reflectors. Our first step was to simply wedge the trim removal tool between the backside of the bumper and front edge of the reflector mounting flange. The idea here is to use leverage to pry the reflector from the adhesive. Step 9: While prying from the back of the bumper use your fingers to apply pressure on the reflective amber surface of the reflector. Both of these forces should result in successful removal. Step 10: With the reflector removed we highly recommend cleaning the back of the bumper. A little adhesive remove goes a long way in this case. Step 11: Now that the surface is cleaned, peel the cover protecting the new adhesive on the color-matched front reflector. Carefully line the reflector up and apply even pressure. Check alignment again and use your fingers to apply pressure around the back of the reflector. Step 12: Reverse steps 1-7. Upon installing your wheels, please make sure that your wheels are torqued to the appropriate specification. Admire your work and move to the next side This reflector install is a little more work than past models, but the results are the same. If you do not feel comfortable performing the install, please contact your local body shop for an appointment.  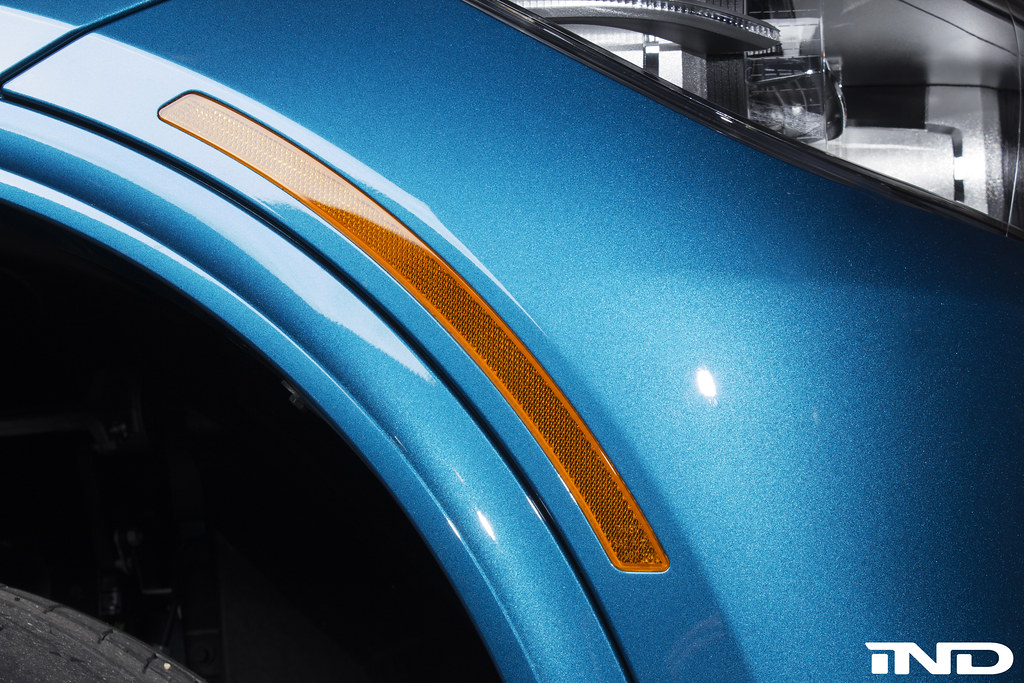  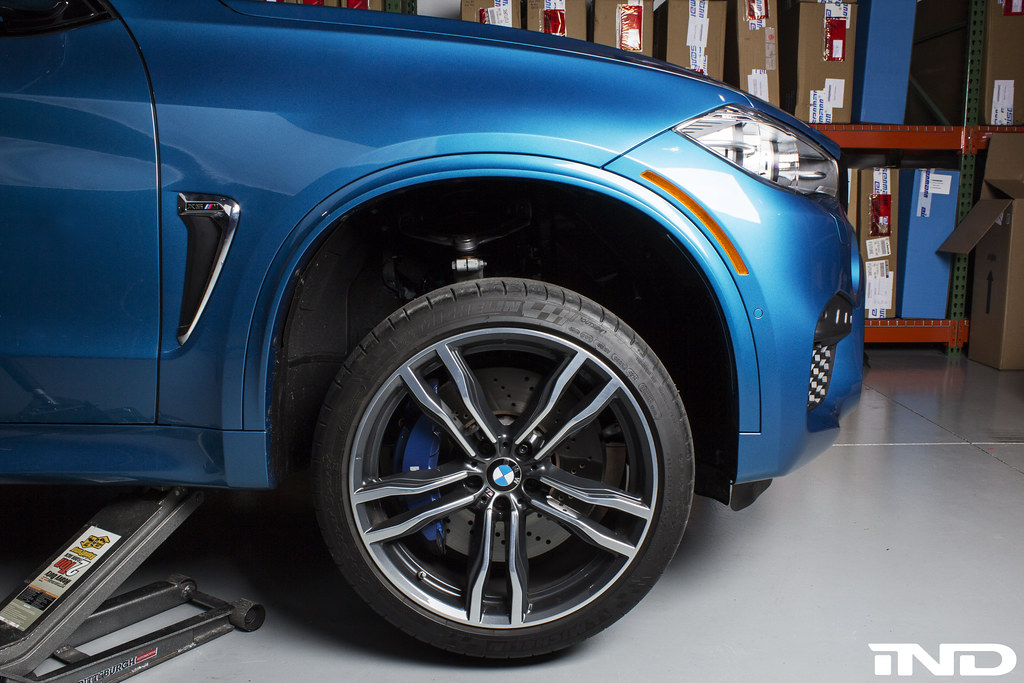 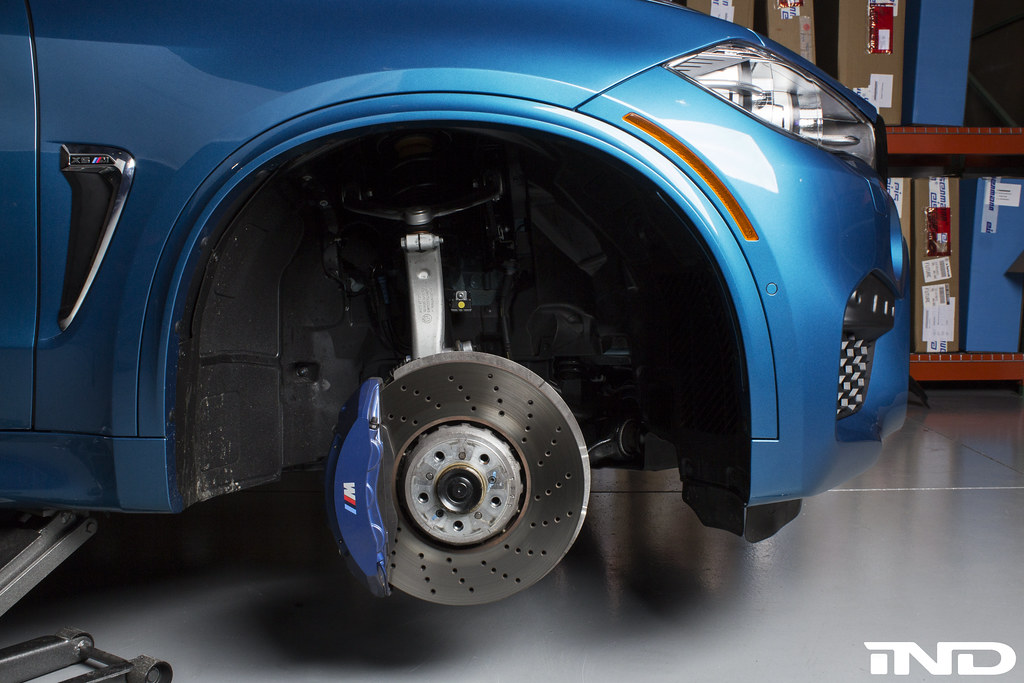 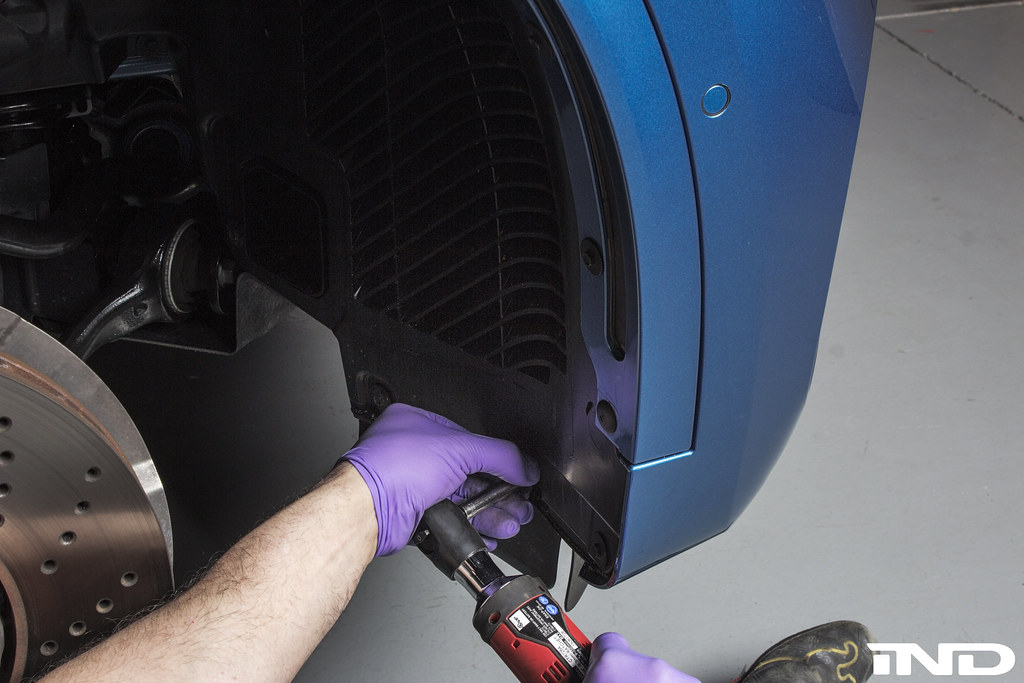 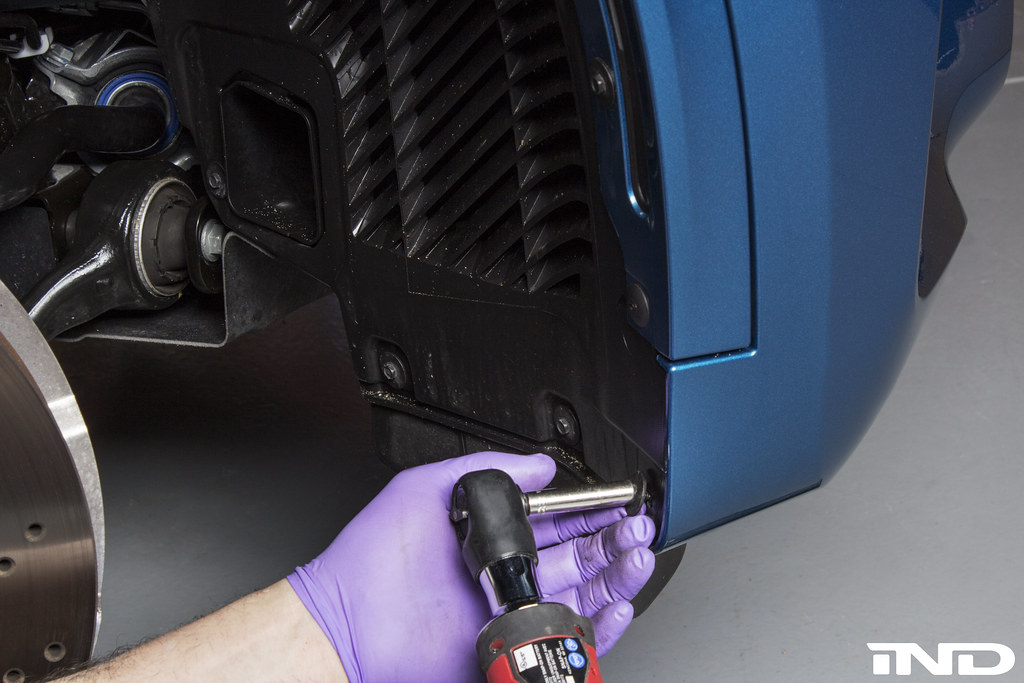 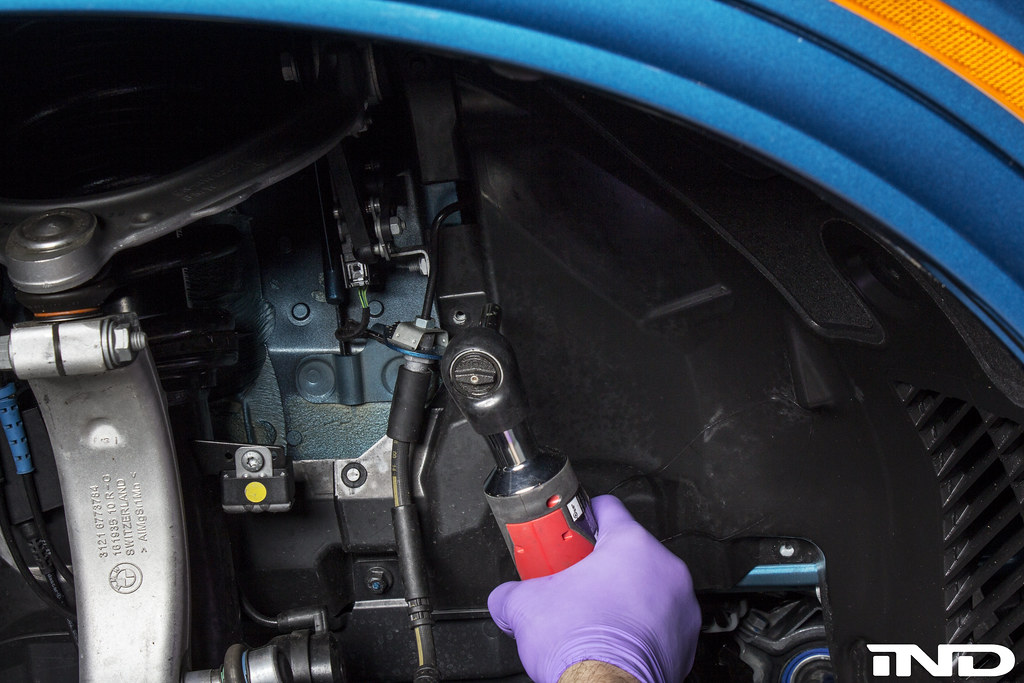 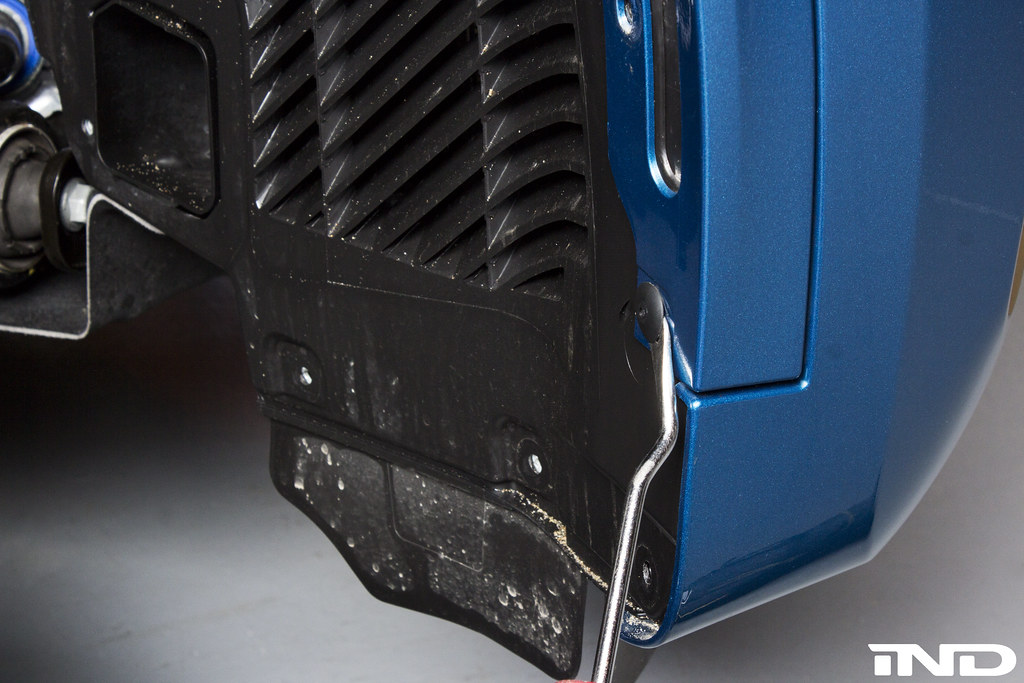  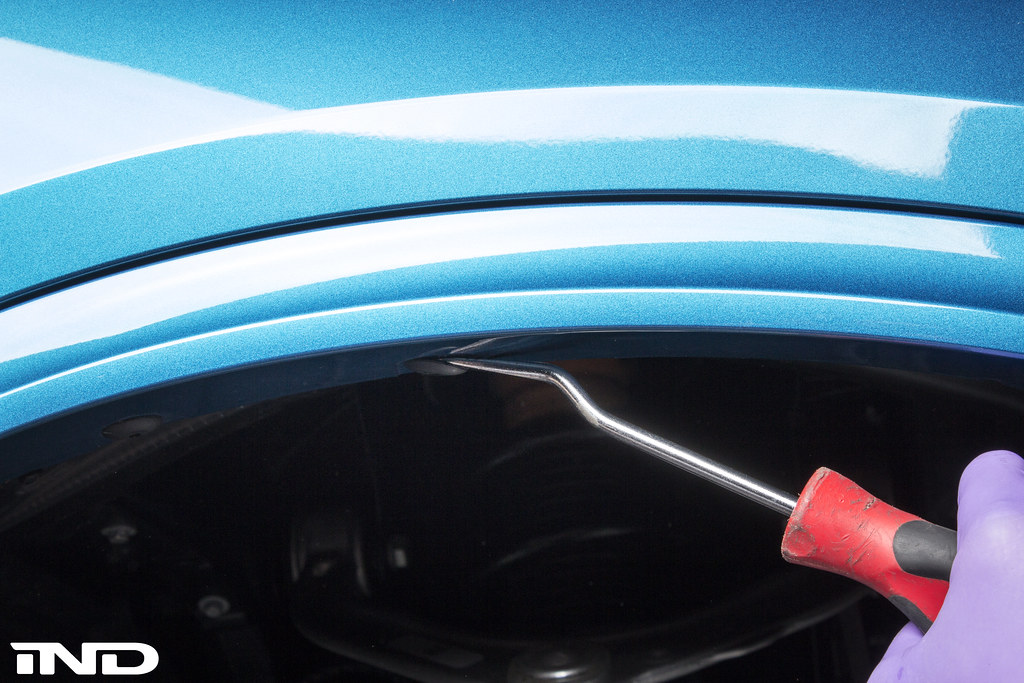 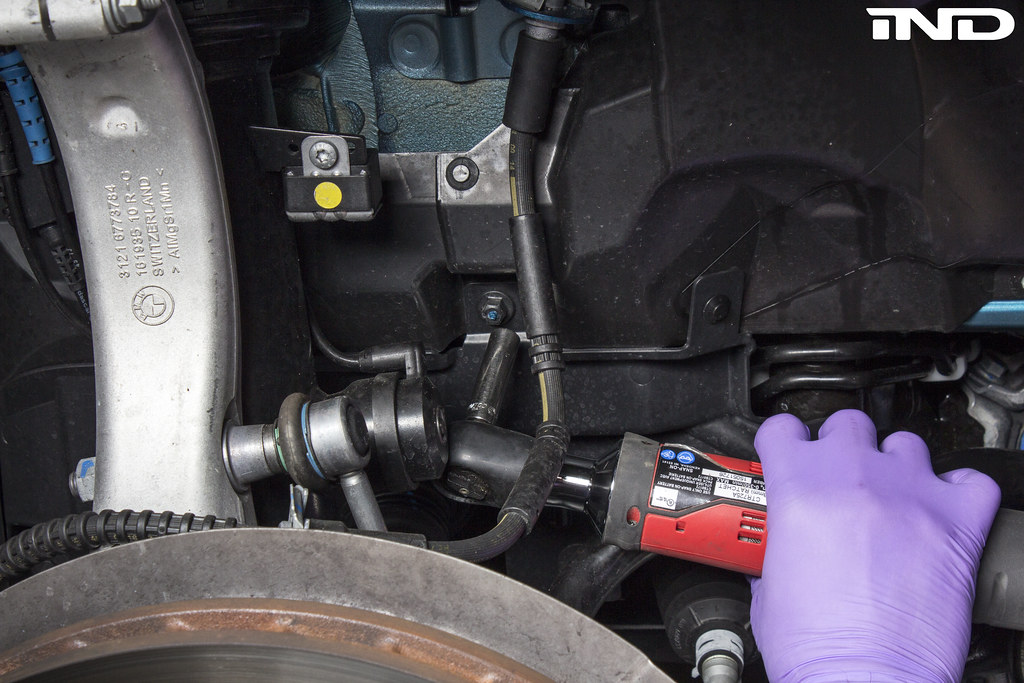  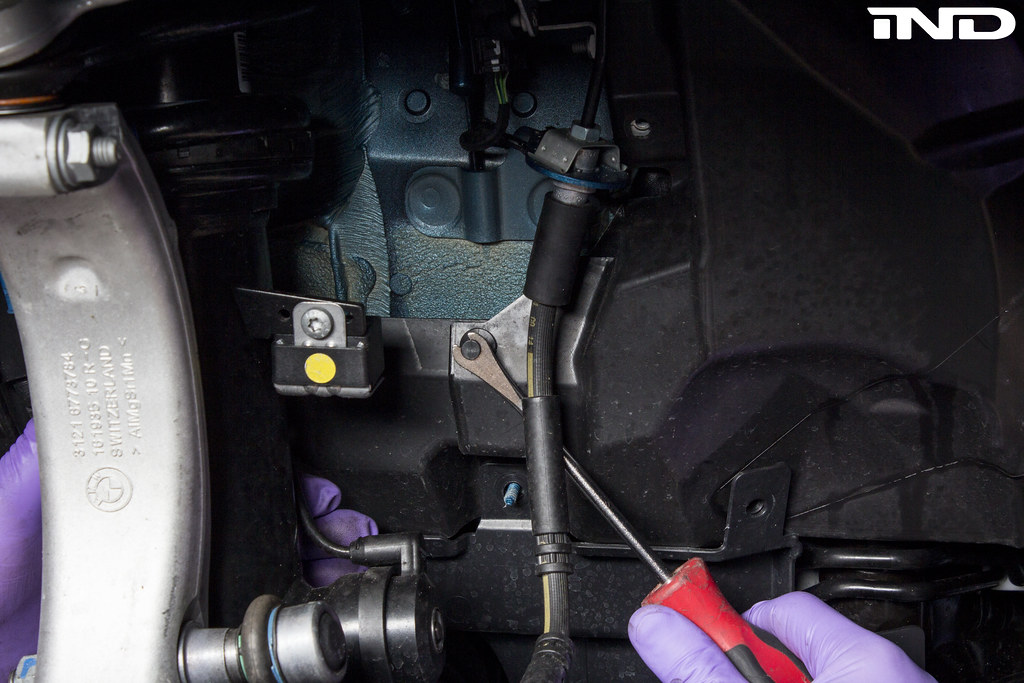  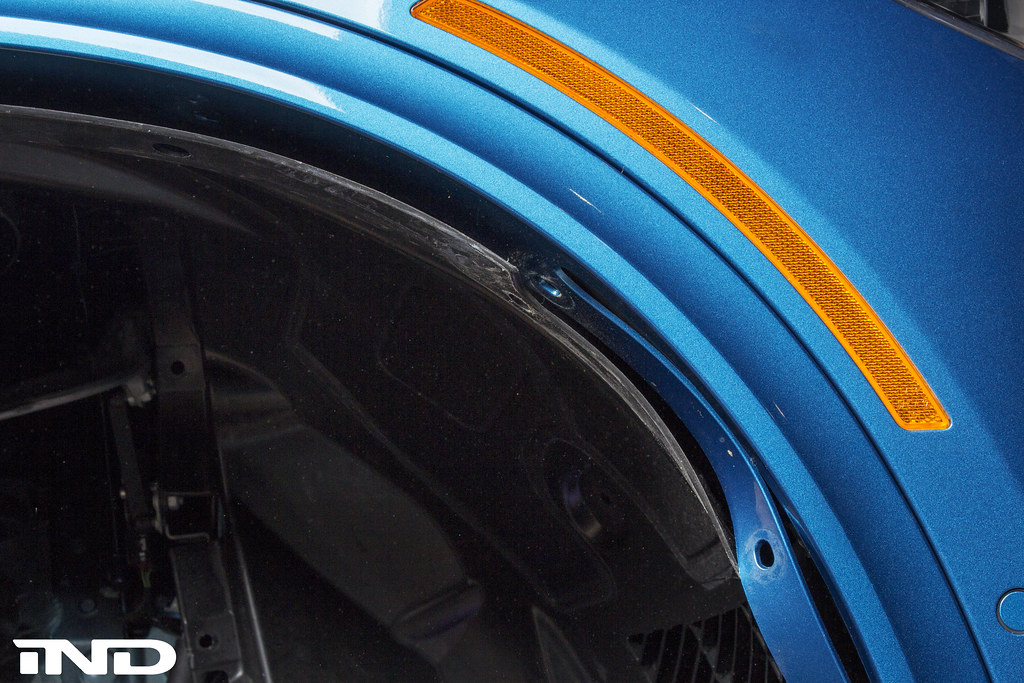  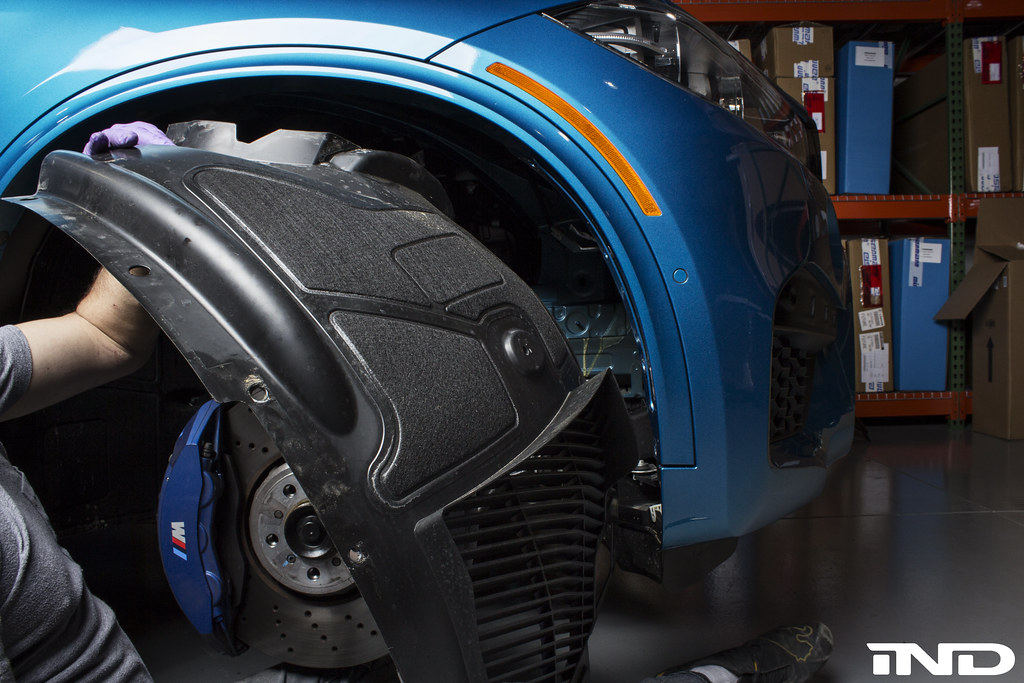   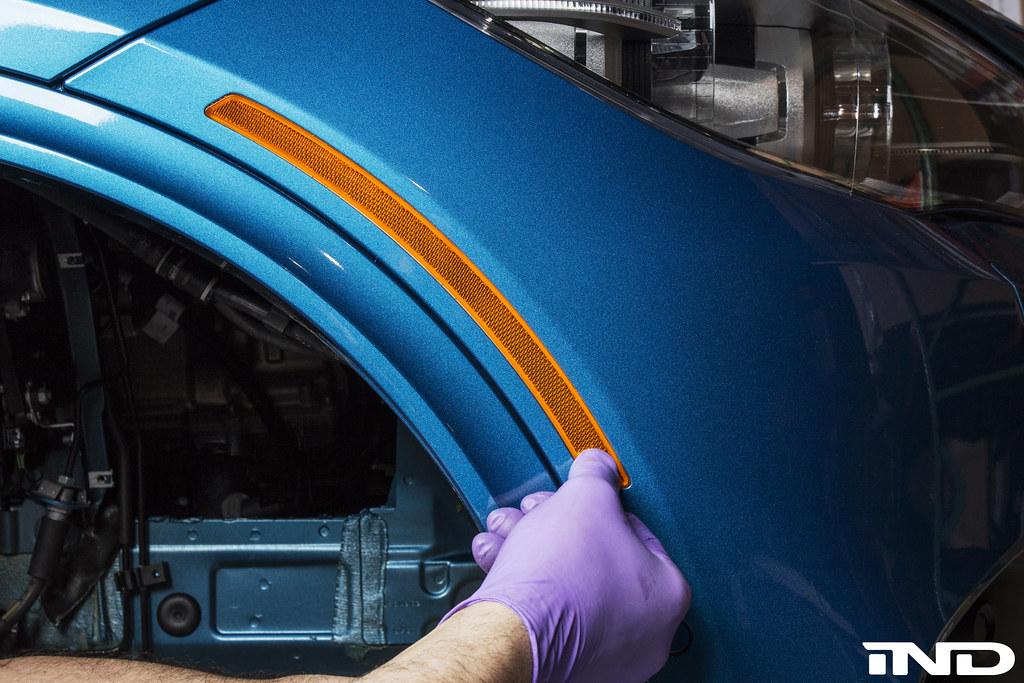 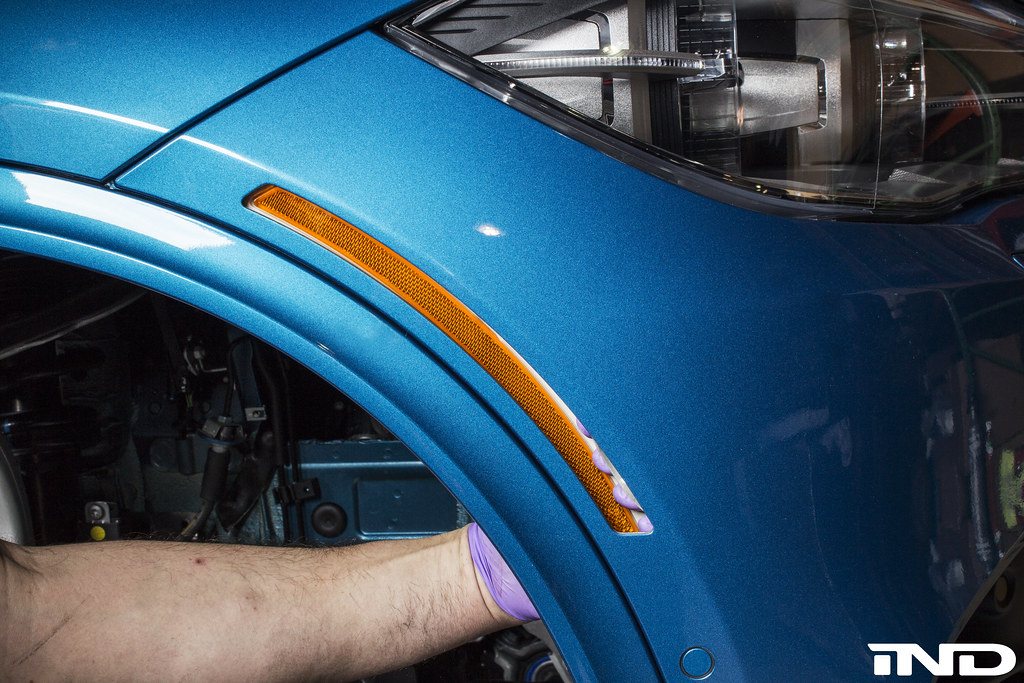 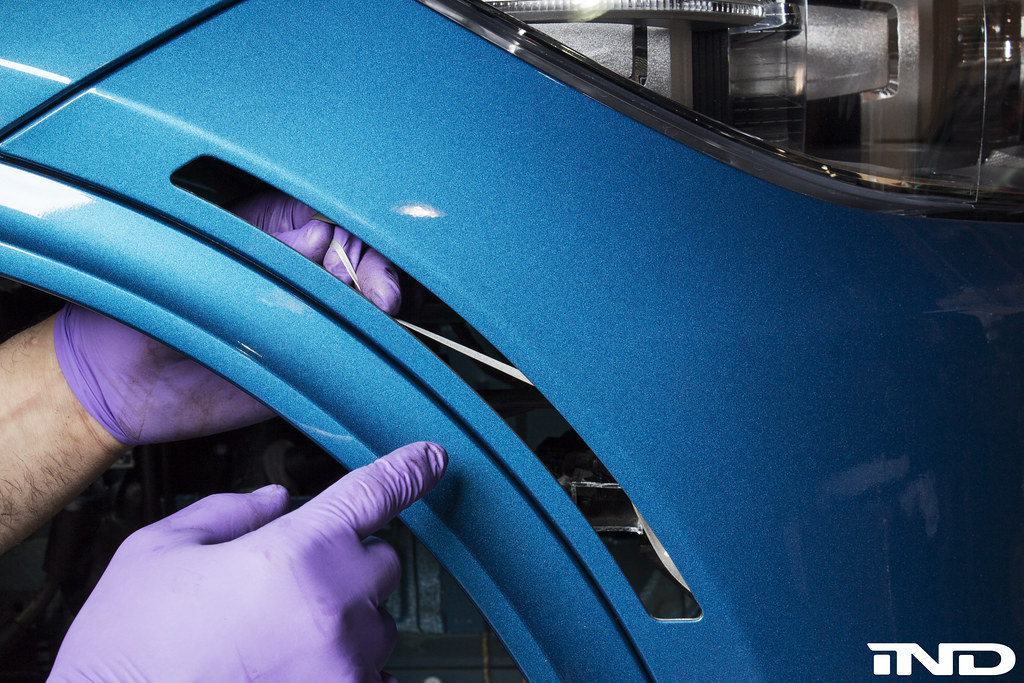 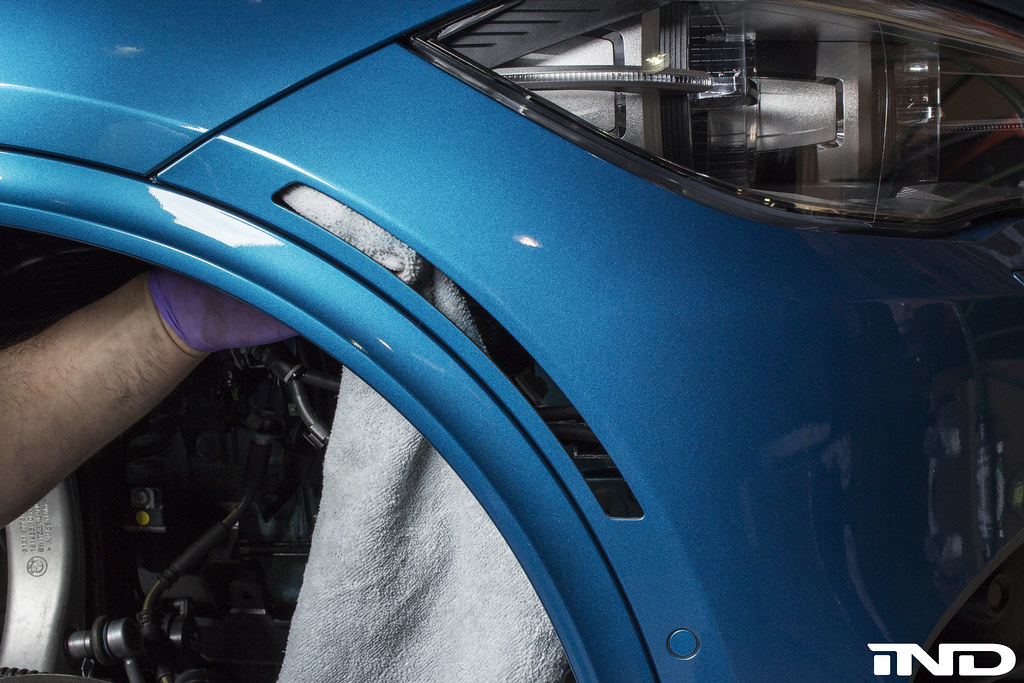 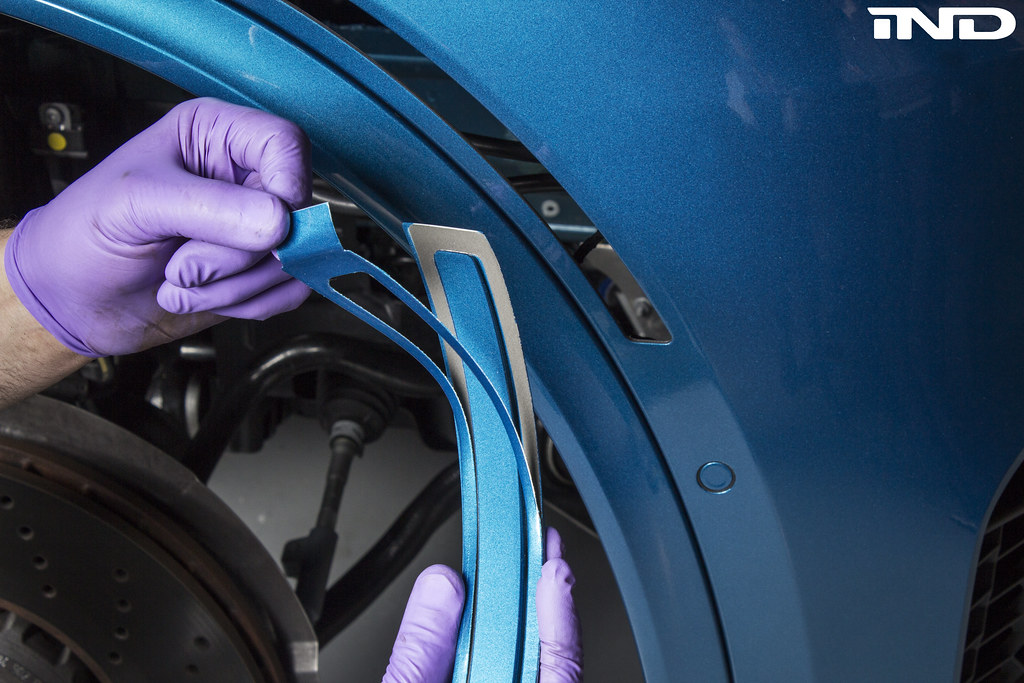 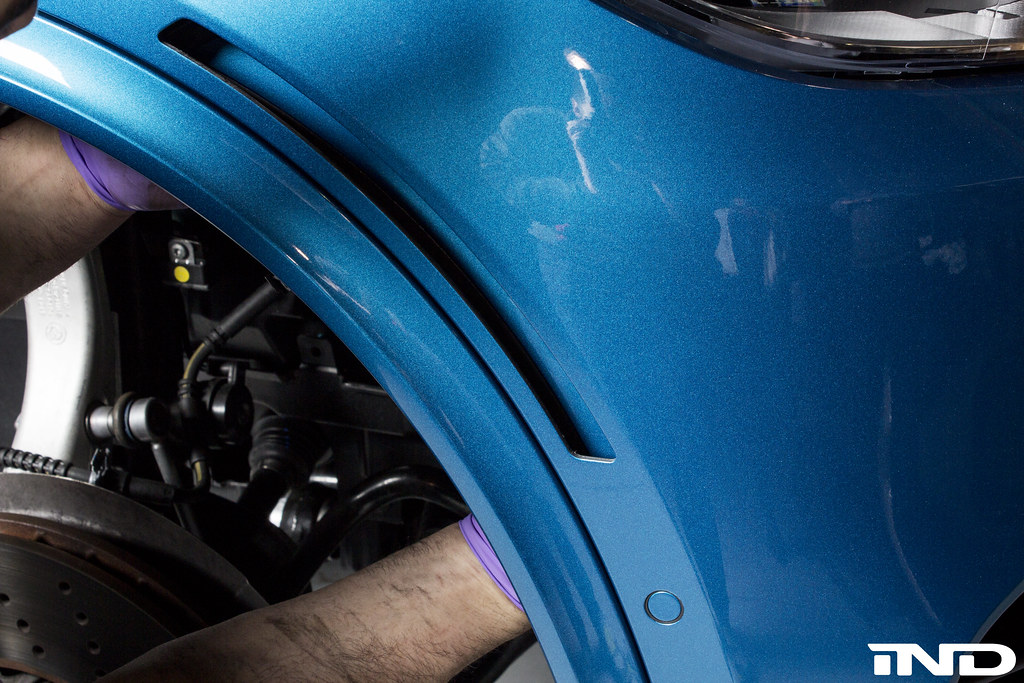 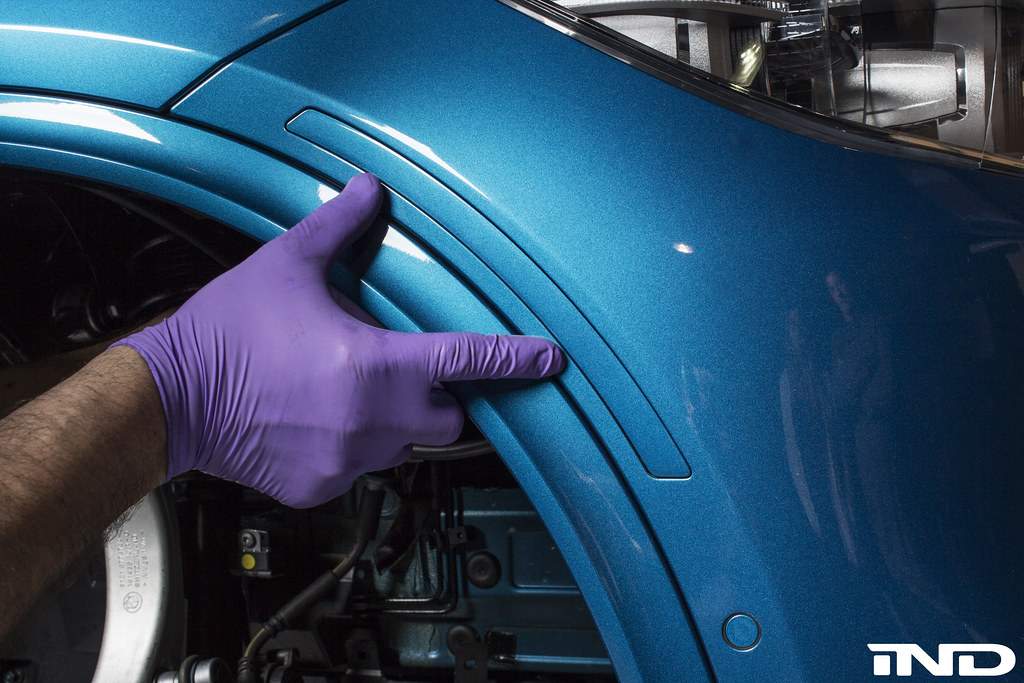 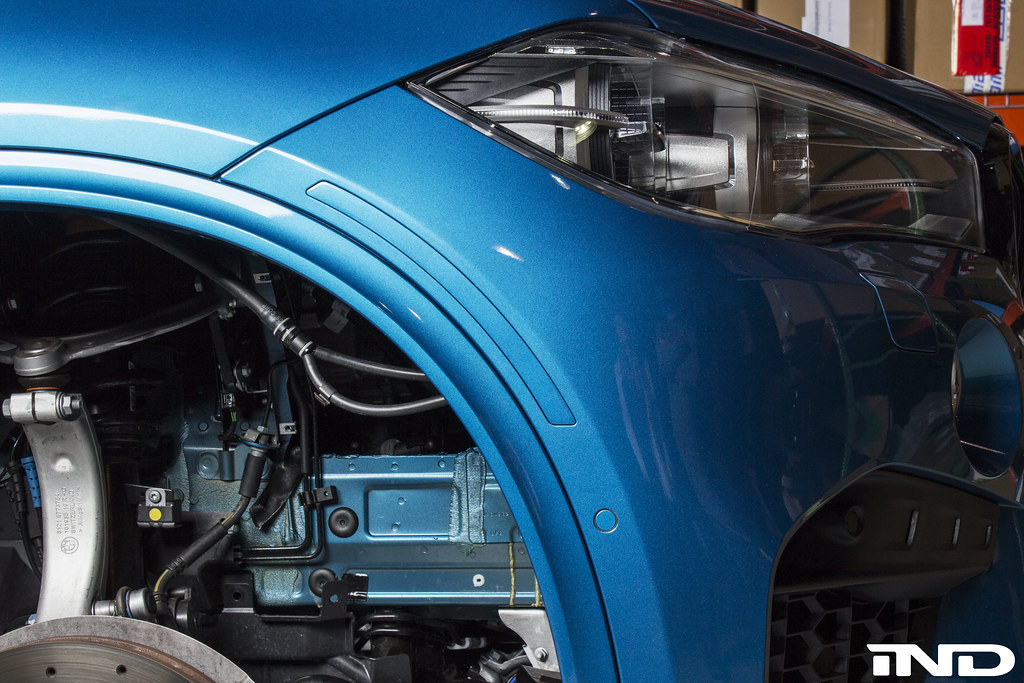  
__________________
Last edited by Ryan@IND; 04-15-2015 at 05:39 PM.. |
| 04-15-2015, 07:01 PM | #2 |
|
Colonel

1644
Rep 2,775
Posts
Drives: F95 X5MC
Join Date: Oct 2007
Location: New Jersey
|
Wow, that looks amazing! Nice job! Great DIY!
__________________
2020 F95 X5///M Competition CarBahn Autoworks Stage 1 | 2023 Lamborghini Huracan Tecnica
|
|
Appreciate
1
|
| 04-15-2015, 07:12 PM | #3 |
|
Major General

1103
Rep 7,063
Posts |
Gives me hope to do mine which have been sitting in my trunk since January.
Didn't believe this would be more time consuming than the E series BMW's
__________________
E90 Build Thread (SOLD) http://www.e90post.com/forums/showthread.php?t=809436
F15 Build Thread (SOLD) http://f15.bimmerpost.com/forums/sho....php?t=1064084 |
|
Appreciate
0
|
| 04-15-2015, 07:33 PM | #4 |
|
Private First Class
 82
Rep 112
Posts
Drives: 2015 X5M
Join Date: Dec 2014
Location: Santa Barbara, CA
|
Looks great. Definitely on my list of planned mods...
|
|
Appreciate
1
|
| 04-16-2015, 12:35 AM | #5 |
|
General
12968
Rep 18,713
Posts |
Nicely done. I guess my DIY was on the spot on the need of removing the fender liner.

__________________
Email:sales@rgsport.com | IG:RGSport_USA | Web:RGSportShop.com PM for Everyday DEALS!! MSS iSweep RaceChip Sterckenn AutoTecknic Akrapovic Vossen Wheels Eventuri Active Autowerke KW H&R Ohlins Remus and more... |
|
Appreciate
1
|
| 04-16-2015, 09:38 AM | #6 | |||
|
1767
Rep 7,651
Posts |
Quote:
 Quote:

__________________
|
|||
|
Appreciate
0
|
| 05-01-2015, 11:28 AM | #7 |
|
Private
 
38
Rep 95
Posts |
So for step 4, will I need to buy 3 replacement rivets as the ones I am removing are "one time use"? Do you supply these oem rivets with your painted reflectors?
|
|
Appreciate
0
|
| 05-01-2015, 12:22 PM | #8 | |
|
1767
Rep 7,651
Posts |
Quote:
__________________
|
|
|
Appreciate
0
|
| 05-02-2015, 04:00 PM | #10 | |
|
1767
Rep 7,651
Posts |
Quote:
__________________
|
|
|
Appreciate
0
|
| 02-07-2016, 07:29 AM | #11 |
|
Lieutenant

118
Rep 455
Posts |
Well, I finished this project as well as the side grilles (and fronts) yesterday. This DIY is a huge help, but I noticed a few things I thought I'd post here for those who try this in the future. First off, the pieces provided by IND were top notch quality, exactly as described. Packed safe as could be for shipping, and beautiful quality.
Overall, the hardest part is removing the fender liner. It's a total *****. Reinstalling is harder. But it is feasible. Once all of the fasteners are removed, my suggestion is to flex the liner as much as possible around the suspension which will allow some play at the wheel arch. This way you can the slide the liner from under the plastic trim on the inside of the wheel arch, and finally remove it. You'll need a plastic rivet gun for the 3 OEM non-replaceable rivets. Either that, or you can do what I did (since I didn't have one) and use a vicegrip and a cat's paw tool, but that was gnarly and required lots of force and was risky. I'd also recommend using a plastic trim tool set to first loosen those non-replaceable rivets, as any metal tool can do damage to the paint unless you're an expert and the paint on the those plastic surfaces is fragile. Once loosened, the metal rivet removal tool will help pull the rivet. Take a few pics to help with what should go back where. My vehicle didn't have a 12mm single plastic bolt, but instead it's 10mm. On the passenger side of the inside of the wheel arch there are rubber supply hoses (visible in the pics above) to what I think are the headlight washers. I'd suggest unhooking the rubber hose that is looped through a plastic retainer on the inside of the fender prior to installation of the new piece as it makes it a bit easier. Other than that I think it turned out perfect. Need to wash the car, but the paint match (Sapphire black metallic for me) is identical. Top quality product and well worth the investment IMO. HTH! Jon |
|
Appreciate
0
|
| 02-24-2016, 08:47 PM | #13 |
|
Colonel

187
Rep 2,245
Posts
Drives: '16 991.1 911 GTS, '16 F85 X5M
Join Date: Apr 2012
Location: NNJ
|
Damn this is a lot more complicated than I had hoped.
__________________
2016 991.1 911 Carrera GTS
2016 F85 X5M - Carbon Black/Mugello Red |
|
Appreciate
0
|
| 02-24-2016, 09:05 PM | #14 | |
|
General
12968
Rep 18,713
Posts |
Quote:
__________________
Email:sales@rgsport.com | IG:RGSport_USA | Web:RGSportShop.com PM for Everyday DEALS!! MSS iSweep RaceChip Sterckenn AutoTecknic Akrapovic Vossen Wheels Eventuri Active Autowerke KW H&R Ohlins Remus and more... |
|
|
Appreciate
0
|
| 02-26-2016, 11:52 AM | #17 | |
|
Lieutenant
118
Rep 455
Posts |
Quote:
 I kind of enjoy doing the modding myself, however, and ending up with a positive mod based off of my own handiwork. I kind of enjoy doing the modding myself, however, and ending up with a positive mod based off of my own handiwork. |
|
|
Appreciate
0
|
| 02-26-2016, 11:57 AM | #18 | |
|
General
12968
Rep 18,713
Posts |
Quote:
Imagine how much pain you have to go through to have your wife pretty. Hahaha. The long wait everytime about to go somewhere, the expenses on clothing, shoes, and bags. 
__________________
Email:sales@rgsport.com | IG:RGSport_USA | Web:RGSportShop.com PM for Everyday DEALS!! MSS iSweep RaceChip Sterckenn AutoTecknic Akrapovic Vossen Wheels Eventuri Active Autowerke KW H&R Ohlins Remus and more... |
|
|
Appreciate
0
|
| 07-20-2016, 11:18 AM | #19 | |
|
Private
42
Rep 67
Posts |
Quote:
|
|
|
Appreciate
0
|
| 07-20-2016, 03:24 PM | #21 | |
|
Captain
359
Rep 729
Posts |
Quote:
|
|
|
Appreciate
0
|
| 07-20-2016, 04:28 PM | #22 | |
|
Enlisted Member
 11
Rep 41
Posts |
Quote:
http://www.harborfreight.com/hand-ri...ets-97757.html |
|
|
Appreciate
1
aracka60.00 |
Post Reply |
| Bookmarks |
|
|


